Teams & Brightspace
Made by David Compson with Scribe
If you would like a simple way to have a folder/file structure of items shared with students, see the steps below on how to do so. At a broad level, the process involves
- Creating a Team synced to a Brightspace section
- Sync the Team's files to your PC/Mac for you
- Send a link to students for the folders
Once completed, you can interact with the files/folders in question without ever having to reopen the Teams app.
1. Open Brightspace and navigate to the course you would like to use Teams with

2. Click Create Course Team, then wait for confirmation that it has been made

3. Open Teams in the left hand menu

4. Open the Team with a name matching the class you are using

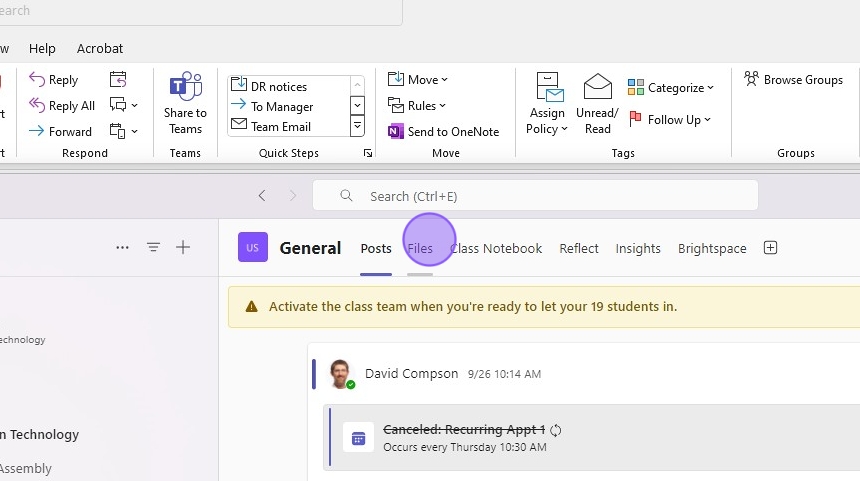
5. Click General

6. You will need to Activate the course in Teams before using with students

7. Click Files
8. To make files available on your PC/Mac, click "Sync"

9. This message will appear
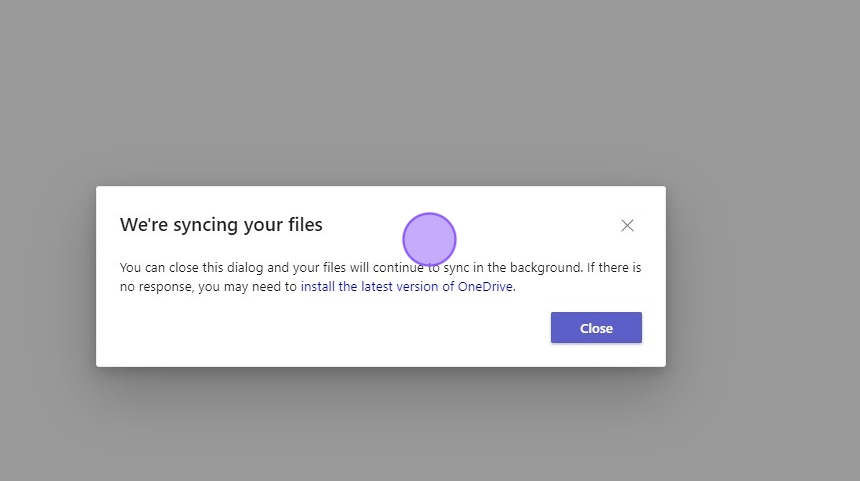
10. Another window will pop open and close on its own.

11. Click Close

12. To get a link for Students to use, click "Open in Sharepoint"
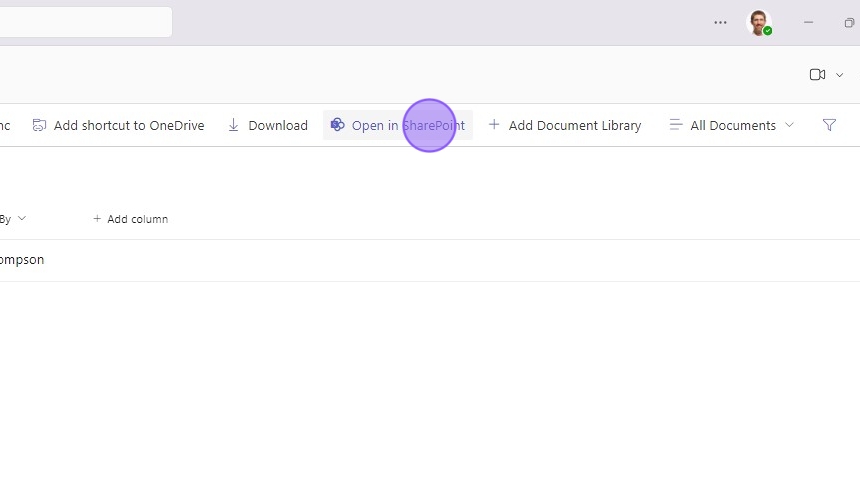
13. The page that opens can be bookmarked for all members of the Team to access the files on an ongoing basis.

14. To open the files yourself, click File Explorer or Finder

15. Look for the blue "Taylor University" icon on the left hand menu, expand it to view all synced folders. (On Mac, this will show as “OneDrive - Shared Libraries”)

16. Click the folder with the class name

17. Files or folders saved to that folder now will appear for all members of the Team

18. Files will appear in the folder for students

19. Files can also be viewed from Teams itself

Made with Scribe
Was this article helpful?